SoftNAS™ Reference Guide |
||
|
|
||
|
Copyright © 2012 SoftNAS, LLC.
|
SoftNAS™ Reference Guide |
|||||||
|
|||||||
|
Copyright © 2012 SoftNAS, LLC.
|
 Configuring Disk Devices Module
Configuring module is easy. Simply follow the steps given below.
1. Click the Module Config button.
The Configuration for Module Partitions on Local Disks will be displayed.
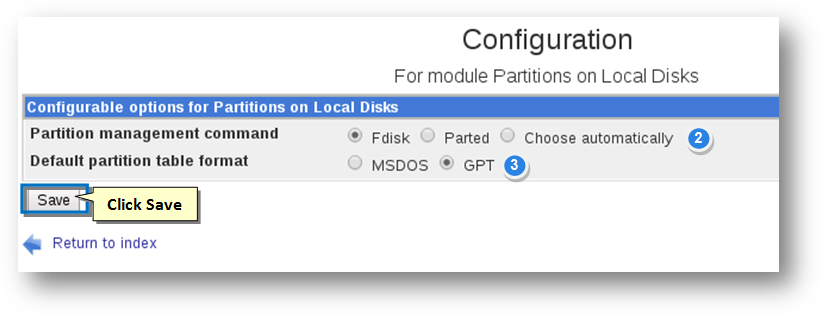
2. Select the Partition Management Command. The available options include Fdisk, Parted and Choose automatically.
3. Select the Default Partition Table Format. The available options include MSDOS and GPT.
4. Click the Save button.
The changes to the configuration module will be updated.
|
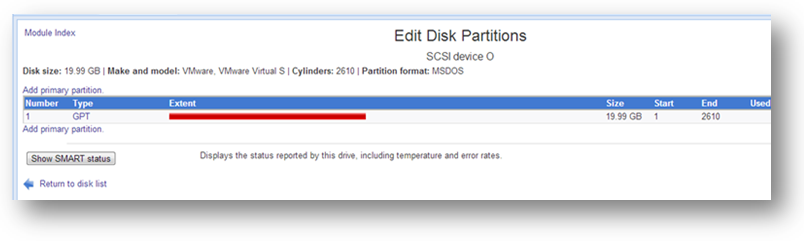
 Partitioning a Disk
Partitioning a disk device is very easy. Simply follow the steps given below.
Note: If you are installing for the first time, all of your disk devices will show no partitions (except SCSI device A, which has the 30 GB disk that SoftNAS was installed on).
1. Click the name of the unpartitioned raw disk.
The Edit Disk Partitions section will be displayed.
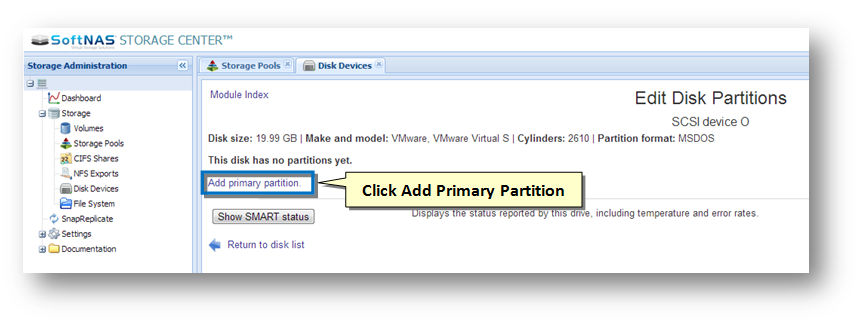
2. Click the Add Primary Partition link.
The Create Partition section will be displayed.

3. The Location Type specifies the partition type setting. Retain the selection of default value, GPT in the Location Type drop down list.
4. By default, the device will be partitioned with a single, large partition.
5. Click the Create button.
The disk will now be partitioned and ready to be used for creating storage pools.
 |
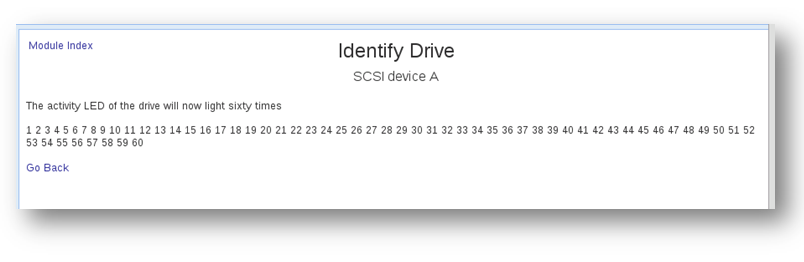
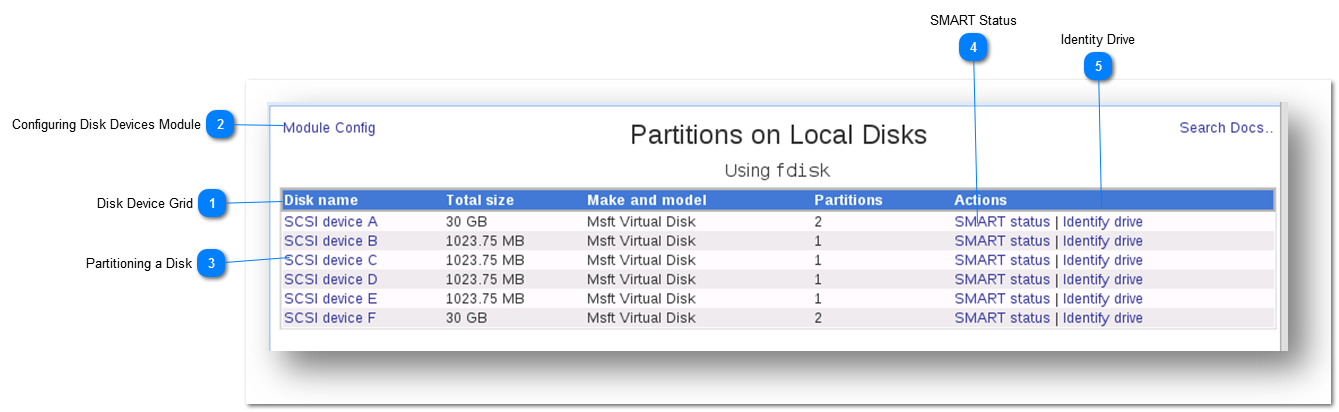
 SMART Status
You can view the SMART Status of a disk drive.
1. Click the SMART Status option in the Actions column of the disk drive.
The SMART Drive Status of the selected drive will be displayed. It shows the details of location, make and model and drive size. It also shows whether the disk is SMART enabled and support SMART.
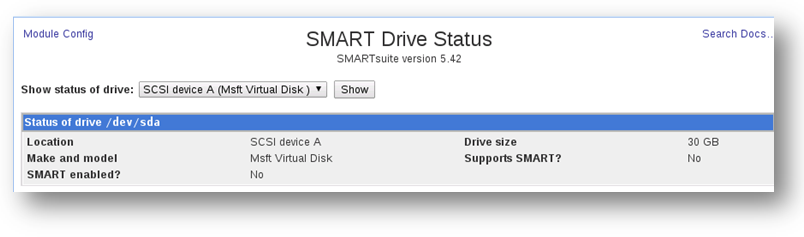
2. You can also select the different drive to see its SMART status by selecting from the drop down list.
3. Click the Show button.
The SMART Drive Status of the selected drive will be displayed.
|