Adding a New Bonding Interface
Adding a new bonding interface is easy. Simply follow the steps given below.
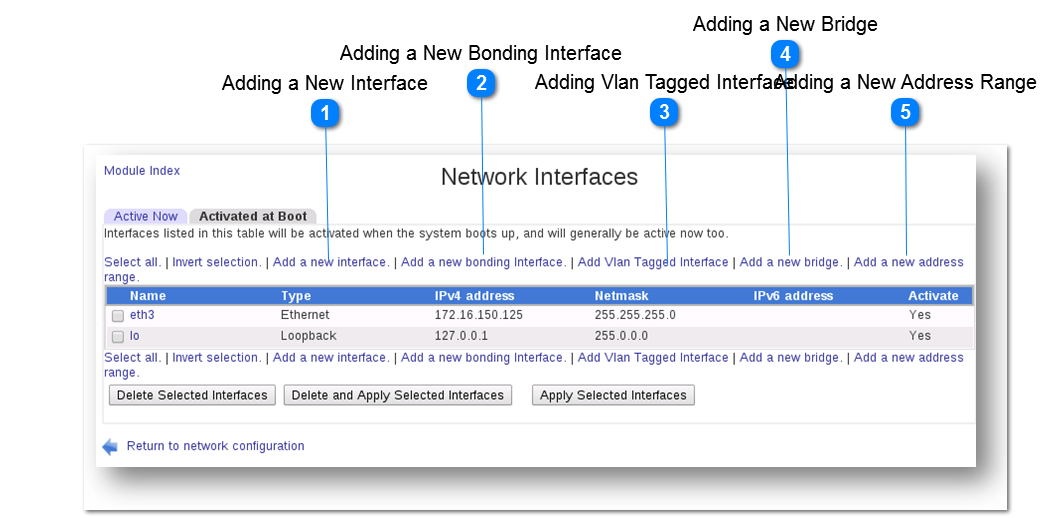
1. Click the Add a New Bonding Interface button.
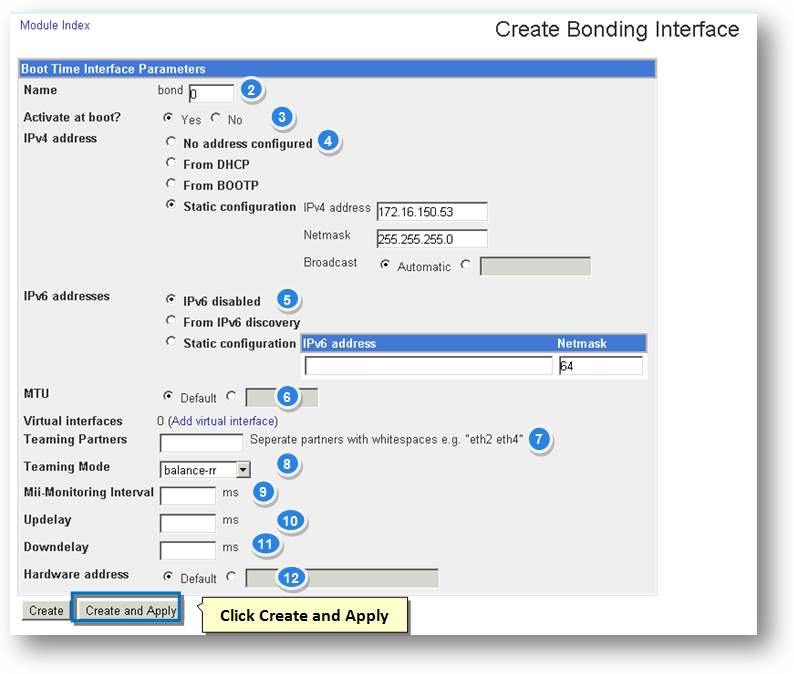
The Create Bonding Interface page will be displayed.
2. The name of the bonding interface is automatically assigned.
3. Specify whether you wish to activate this interface at boot time or not by choosing Yes or No option in the field.
4. Specify the type of the IPv4 address to be configured in the field. The available options are
-
-
-
-
Static Configuration with netmask and broadcast IPs
5. Specify the type of the IPv6 address to be configured in the field. The available options are
6. Specify the value for MTU either as Default or enter manually.
7. Select the virtual interface. You can also add new interface here.
8. Enter the name of the teaming partners in the Team Partners text entry box, each seperated by white space.
9. Select the mode of teaming from the Teaming Mode drop down list.
10. Enter the value for Mii-Monitoring interval in milliseconds in the Mi-Monitoring Interval text entry box.
11. Enter the value for updelay in milliseconds in the Updelay text entry box.
12. Enter the value for downdelay in milliseconds in the Downdelay text entry box.
13. Specify the value for Hardware Address either as Default or enter manually.
14. Click the Create button.
The new bonding interface will be added.
|