Refresh button
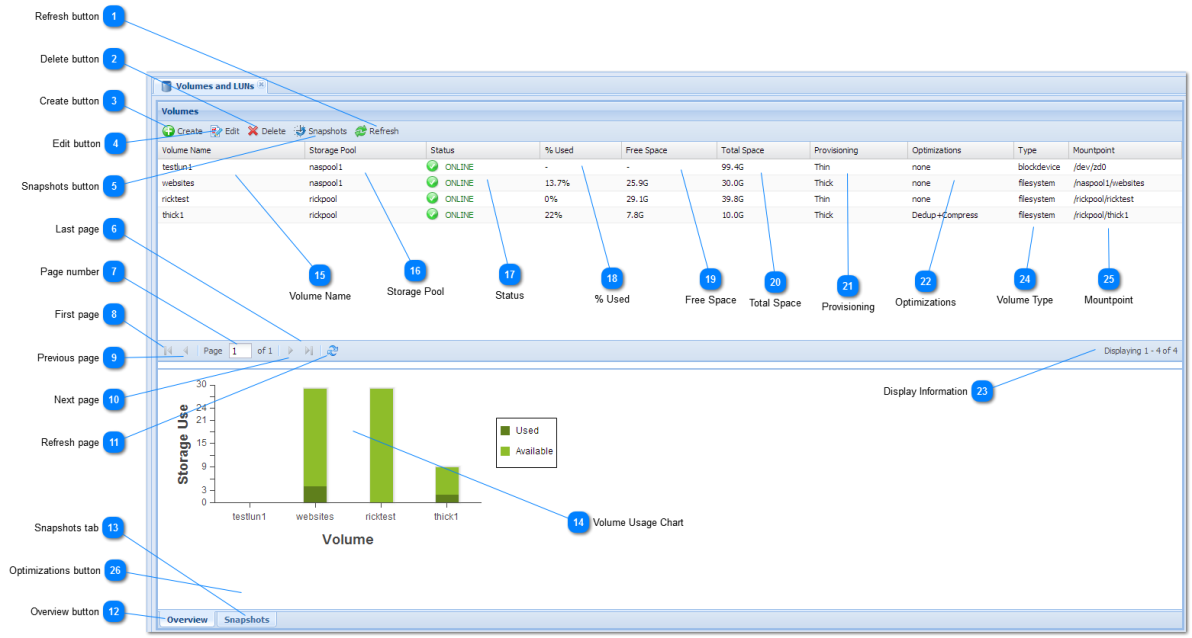
Press Refresh button to update the volumes list with the latest information.
|
 Delete button
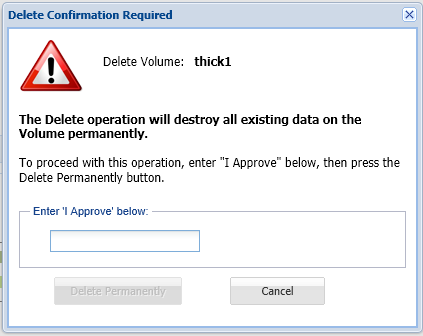
The Delete button is used to delete a volume. To delete a volume, first select the volume to delete by clicking on the volume's row. Once a volume is selected, then click the Delete button.
A delete confirmation dialog appears:
To delete the chosen volume, enter "I Approve" in the edit box provided (the confirmation string "I approve" can be in any combination of upper and/or lower-case).
Then press the "Delete Permanently" button to permanently destroy the volume. Once a volume is deleted, it cannot be brought back (except via a storage snapshot at a given point in time, if a snapshot exists).
|
 Create button
The Create button is used to create a new volume.
See Create Volume for more details on how to specify a volume's details and create it.
|
 Edit button
Choose a volume, then press the Edit button to modify a volume's settings.
|
 Snapshots button
Press the Snapshots button to access, view and manage storage snapshots.
|
 Last page
Press to display the Last page of volumes (when the number of volumes exceeds the number that can be displayed on a single page).
|
 Page number
Displays the current page of volumes (when the number of volumes exceeds the number that can be displayed on a single page).
Enter a page number to go to a specific page.
|
 First page
Press to display the First page of volumes (when the number of volumes exceeds the number that can be displayed on a single page).
|
 Previous page
Press to display the Previous page of volumes (when the number of volumes exceeds the number that can be displayed on a single page).
|
 Next page
Press to display the Next page of volumes (when the number of volumes exceeds the number that can be displayed on a single page).
|
 Refresh page
Press Refresh button to update the volumes list with the latest information.
|
 Overview button
Select the Overview tab to display the Volume overview chart.
|
 Snapshots tab
Click on the Snapshots tab to view and manage snapshots.
|
 Volume Usage Chart
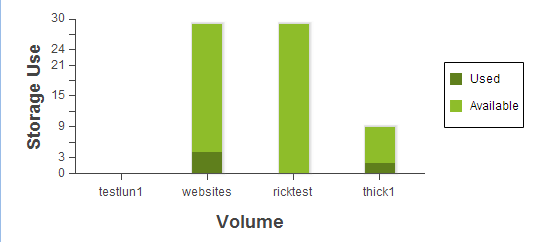
The Volume Usage Chart shows a bar chart summarizing storage usage by volume.
When the mouse cursor is moved over the top of a volume's bar, a summary of usage is displayed as a tooltip popup window.
To examine a single volume, select the volume from the list above.
|
 Volume Name
The name of the volume. Click on a volume's name in the list to select it.
|
 Storage Pool
Displays the volume's assigned Storage Pool.
|
 Status
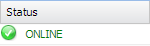
Displays the volume's current status.
The following status indicators may be shown depending upon the state of the volume's storage pool.
 ONLINE icon indicates the volume and pool are online, healthy and operating normally.
 DEGRADED icon indicates the volume's pool is in a degraded state, continues to process data normally, but is at increased risk and requires attention; e.g., replace a failed disk in a RAID array.
 UNAVAIL or FAILED icon indicates the volume's pool is in a failed state and is not currently processing storage requests. This usually means there are disk failures exceeding RAID protection.
|
 % Used
The percentage of available storage used. For thin-provisioned volumes, this is the percentage of the storage pool used. For thick-provisioned volumes, this is the percentage of the volume's allocated space used.
|
 Free Space
The amount of free space available for use, in gigabytes.
|
 Total Space
The total amount of space in the volume, in gigabytes. For thin-provisioned volumes, this is the same as the underlying storage pool's size. For thick-provisioned volumes, this is the volume size that was assigned.
|
 Provisioning
The volume's provisioning type - Thick or Thin.
|
 Optimizations
The volume's configured optimizations:
none - no optimizations configured
Dedup - deduplication is enabled
Compress - data compression is enabled
Dedup+Compress - both deduplication and compression are enabled
|
 Display Information
Information on current volume's displayed (range of volumes shown out of total available on all pages).
|
 Volume Type
The type of volume:
- blockdevice - volume is a block device, commonly used for iSCSI LUN creation and sharing. Block device mount points are in the /dev/ filesystem.
- filesystem - volume is a filesystem type, commonly used for NFS and CIFS sharing (or FTP and other supported protocols)
|
 Mountpoint
Shows the mount point used to access the volume in the Linux filesystem.
|
|