SoftNAS™ Reference Guide |
||
|
|
||
|
Copyright © 2012 SoftNAS, LLC.
|
SoftNAS™ Reference Guide |
|||||
|
|||||
|
Copyright © 2012 SoftNAS, LLC.
|
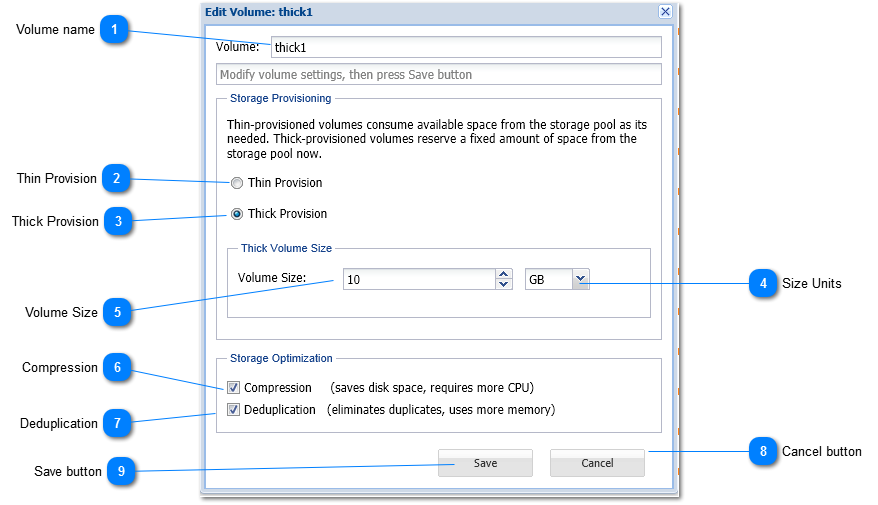
 Deduplication
Select Deduplication to eliminate duplicate disk blocks from being written to disk. For certain types of data (e.g., Windows virtual machine images, which are highly-redundant in virtual desktop applications), deduplication can save up to 80% on storage requirements by eliminating duplicate data. Each time a duplicate data block is to be written, a pointer to the existing duplicate block is created instead, along with increasing the duplicate block reference count. To make these operations as fast as possible, a table of deduplicated blocks is maintained. A hash table of deduplicated blocks is kept in memory to make lookups very fast. When a duplicate block is read, it is usually in cache memory and is simply returned with no disk I/O required.
It is recommended to avoid using deduplication unless the data is highly-duplicative, because of the memory impact of deduplication. It is estimated that for every terabyte of deduplicated data managed, one gigabyte of memory is required for the deduplication lookup tables. These tables compete with cache memory, which can reduce the overall performance of SoftNAS. For more details on best practices for use of deduplication, please refer to System Requirements.
|


